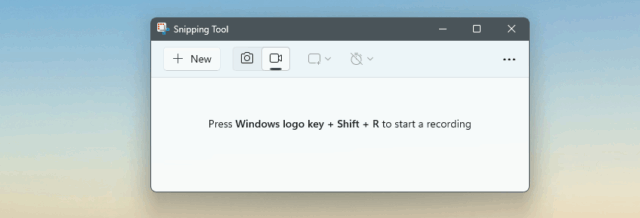
In a recent update, Microsoft added screen recording functionality to the built-in Snipping Tool in Windows 11—making it easy to capture quick videos without installing extra software.
Whether you’re recording a tutorial, showing an issue to support, or capturing a presentation, here’s how to use it—including enabling your microphone if you’d like to record voice.
Step 1: Make sure you’re using the latest version
First, ensure your PC is running Windows 11 version 22H2 or later. The screen recording feature is available starting with Snipping Tool version 11.2211.35.0 and up.
To check:
-
Open Microsoft Store
-
Click on Library in the bottom-left corner
-
Click Get updates to make sure Snipping Tool is up to date
Step 2: Open the Snipping Tool
You can launch the Snipping Tool by:
-
Pressing Windows key + Shift + S (this goes straight to screenshot mode)
-
Or by typing Snipping Tool in the Start menu and opening it from there
To screen record, you must open it from the Start menu, not the keyboard shortcut.
Step 3: Switch to recording mode
Once the Snipping Tool is open:
-
Click on the video camera icon at the top — this switches the mode from screenshot to recording
-
Click the New button
Your screen will fade slightly, and a selection tool will appear.
Step 4: Select the area to record
Use your mouse to drag and select the part of the screen you want to record.
Once you’ve made your selection, a small control bar will appear with:
-
Start button
-
Cancel option
-
Microphone toggle (if a microphone is available – see below)
Step 5: Start and stop the recording
When you’re ready:
-
Click the Start button
The recording will begin after a short countdown.
To finish:
-
Click the Stop button in the floating controls
The recording will stop and automatically open in a preview window.
Step 6: Save the recording
After stopping the recording:
-
The video preview will open in the Snipping Tool
-
Click the Save icon in the top-right
-
Choose a name and location
By default, recordings are saved as .mp4 files to your Videos > Captures folder.
You can also choose a different location if you prefer.


